
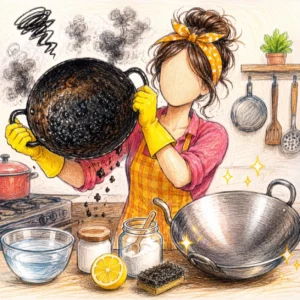
We’ve all had that moment of culinary overconfidence. You decide to make a gorgeous, sizzling ginger chicken stir-fry. You heat up the oil, throw in the aromatics, and the kitchen smells like a five-star restaurant. Then, your phone pings. It’s a group chat drama, or maybe a video of a golden retriever trying to catch a bubble. You slip away for “just thirty seconds.”
Suddenly, a smell wafts into the living room. It doesn’t smell like a five-star restaurant anymore. It smells like a tire fire.
You sprint back to the kitchen, coughing through a cloud of smoke, to find that your beautiful, dependable karahi (wok) has been transformed. It no longer looks like a premium piece of cookware. It looks like a solid chunk of charcoal dragged out from the depths of a steam engine. The bottom is coated in a thick, crusty, obsidian layer of unidentifiable carbonized matter. It is no longer a pan; it is a coal briquette.
Your first instinct might be to panic, wrap it in a trash bag, and bury it in the backyard under the cover of night so no one knows your shame. But don’t throw it away just yet! Before you give up and order takeout for the rest of your life, let’s look at how to rescue your scorched cookware. Cleaning a burnt pan doesn’t have to be a tragic chore. With a few everyday items you already have in your pantry, we can restore your favorite kitchen tool to its former, gleaming glory.
The Anatomy of the Culinary Crime Scene
Before we grab our cleaning supplies, let’s look at the psychology of the burnt pan. When food burns onto a heavy-duty cooking vessel, it undergoes a process called polymerization. The sugars, fats, and proteins lock hands and form a microscopic, chemical bond with the metal surface. They aren’t just sitting on the pan; they have legally changed their last name and moved in.
This is why simply scrubbing with regular dish soap and a flimsy sponge feels like trying to chop down a giant redwood tree with a plastic butter knife. Your arm gets tired, the sponge shreds into pathetic little green pieces, and the burnt crust just stares back at you, completely unbothered.
To beat the crust, you have to work smarter, not harder. You don’t need gym-level bicep strength; you just need basic kitchen chemistry.
1. Everyday Incidents: The Boiling Water and Baking Soda Miracle
Let’s start with the gentlest, most magical method available. It uses two things that are almost certainly sitting in your kitchen right now: water and baking soda.
Imagine you are trying to remove a stubborn sticker from a new glass jar. If you try to peel it off dry, it rips, leaves a sticky residue, and ruins your manicure. But if you soak that jar in warm water for an hour? The sticker slides off like butter.
We are going to use that exact same logic for your carbonized pan.
               Is the burnt crust thick and stubborn?
                                 │
            ┌────────────────────┴────────────────────┐
            ▼                                         ▼
   Don't scrub it dry!                        Boil water + baking soda!
            │                                         │
            ▼                                         ▼
   ( Tears and broken nails )                 ( Crust lifts automatically )
- The Setup: Fill your scorched cooking vessel with enough water to completely submerge the burnt zone.
- The Secret Weapon: Dump in two massive tablespoons of baking soda. Don’t be stingy. Let it rain white powder.
- The Heat: Put the pan on the stove and bring the water to a roaring boil.
As the water heats up, the baking soda creates a mild alkaline solution. This solution gently breaks the chemical hands of the burnt fats and sugars without scratching the underlying metal. Let it simmer for fifteen minutes. You will literally see giant, terrifying black flakes detach themselves from the bottom and float to the surface like deep-sea monsters. Dump the water out, give it a light wipe, and watch the transformation begin.
2. The Vinegar Strike: For the Truly Haunted Cookware
Sometimes, baking soda alone isn’t enough. If you managed to burn something incredibly sticky—like a honey-glaze or a heavy, sugary tomato sauce—you need to bring out the heavy artillery. Enter white vinegar.
Think about a stubborn argument between two people who refuse to compromise. Sometimes, you need an outside force to step in, shake things up, and break the tension. Vinegar is that outside force. It is acidic, and it loves to dissolve stubborn mineral deposits and burnt proteins.
- Step One: Pour equal parts water and white vinegar into the pan until the crust is covered.
- Step Two: Bring it to a boil on the stove. Your kitchen will smell like a potato chip factory for ten minutes, but it is a small price to pay for salvation.
- Step Three: Remove it from the heat, and carefully add two tablespoons of baking soda. It will fizz up violently like a middle school science project volcano.
This dramatic fizzing action is carbon dioxide gas being released. That physical bubbling action happens underneath the burnt crust, acting like millions of microscopic crowbars prying the carbon away from the metal. Once the fizzing calms down, dump the liquid and use a non-scratch scrubbie. The crust will slide off so fast it will feel like magic.
3. The Power of Coarse Salt: The Exfoliation Method
What if your cooking tool is made of traditional cast iron or seasoned carbon steel? If you have a traditional, unlined metal vessel, you want to avoid using too much soap or boiling it in vinegar for too long, because you don’t want to strip away the built-up non-stick layer of oil.
In this scenario, you need to treat your pan the same way you treat your skin after a long winter: you need a good exfoliation scrub.
Go into your pantry and grab a box of coarse kosher salt or sea salt. Do not use fine table salt; we need those big, crunchy, abrasive crystals.
- The Paste: Pour a generous handful of coarse salt into the dry, cooled pan. Add just a few drops of cooking oil (not water) to create a thick, gritty paste.
- The Scrub: Take a paper towel or an old cloth and rub the salt paste firmly over the burnt areas in a circular motion.
The salt acts as a natural, heavy-duty sandpaper. Because salt crystals are harder than burnt food but softer than iron or steel, they will scrub away the black crust without scratching or gouging the metal underneath. It’s a completely natural, chemical-free way to restore the shine to a traditional metal surface. Once the black spots are gone, rinse with warm water, dry it immediately on a warm burner, and apply a light coat of oil to protect it from rust.
4. The Scent of Victory: Banishing the Burnt Odor
Once the black crust is gone and the metal is shining again, you might think your job is done. But then you take a sniff of the room. The pan looks beautiful, but your kitchen still smells like a campfire that someone tried to put out with old cabbage.
Our sense of smell is deeply tied to our lifestyle comfort. You can’t truly enjoy a clean kitchen if it smells like a culinary disaster happened there three days ago.
To banish the ghost of burnt dinners past, slice a fresh lemon in half. Rub the cut side of the lemon all over the inside of the clean pan, squeezing the juice as you go. Let it sit for five minutes, then rinse with warm water. The natural citric acid neutralizes any lingering carbon odors, leaving your kitchen smelling bright, fresh, and ready for your next attempt at cooking.
5. Moving Forward: Embracing the Flaws
Here is a final piece of lifestyle wisdom for your kitchen journey: a clean pan doesn’t have to look like a brand-new mirror.
If you own a high-quality carbon steel or cast iron cooking vessel, it should develop a dark, mottled, uneven coloration over time. This is called patina. It is a sign of a kitchen that is actually used, loved, and alive. A pristine, perfectly silver pan is a pan that has never cooked a great meal.
┌──────────────────────────────────────┬──────────────────────────────────────┐
│          A BRAND NEW PAN             │         A WELL-LOVED PAN             │
├──────────────────────────────────────┼──────────────────────────────────────┤
│ Shiny, reflective, and sterile.      │ Dark, seasoned, and full of character│
├──────────────────────────────────────┼──────────────────────────────────────┤
│ Food sticks easily to the surface.   │ Naturally non-stick from years of oil│
├──────────────────────────────────────┼──────────────────────────────────────┤
│ Looks like a store display.          │ Looks like the heart of a home kitchen│
└──────────────────────────────────────┴──────────────────────────────────────┘
Don’t stress if there are a few dark swirls or character lines left on the metal after your big cleanup. Those aren’t failures; those are your battle scars. They are proof that you faced a kitchen disaster, refused to back down, and saved your tools from the trash bin.
Conclusion: Back in the Game
The next time a recipe gets away from you and your dinner turns into an unrecognizable black cinder, don’t let it ruin your evening. Take a deep breath, laugh at the absurdity of the smoke detector singing its favorite song, and reach for the baking soda.
Kitchen mistakes are just unwritten lessons in resilience. Your cookware is tougher than you think, and with a little patience, any coal briquette can be turned back into a shining star.
So wipe down the counters, turn on the ventilation fan, and get ready to cook again. The kitchen is waiting, and your restored pan is ready for its next adventure—just remember to keep an eye on that group chat while the stove is on!
References
Lodge Cast Iron – Cast Iron Cleaning & Care Guide