
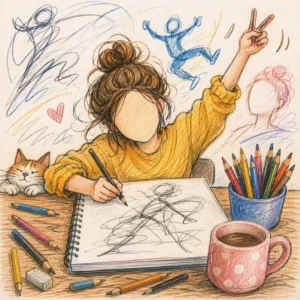
Remember when you were five years old, and someone handed you a pack of crayons? You didn’t sit there staring at the blank paper, breaking into a cold sweat, worrying if your horizontal lines perfectly aligned with the horizon. You just gripped that red crayon like a weapon and went to town. You drew a chaotic, smiling sun in the corner of the page, a house that looked like a lopsided triangle on top of a square, and a dog that looked suspiciously like a potato with legs. It was pure, unadulterated bliss.
Fast forward to adulthood. Now, when you sit down to draw, it feels less like play and more like preparing your tax returns. You hold your pencil so tightly your knuckles turn white. You erase a single line fourteen times until the paper physically wears through. Your neck is stiff, your jaw is clenched, and you are staring down that blank page like it just insulted your grandmother.
What happened to us? Somewhere along the line, we traded the joy of creation for the tyranny of perfectionism. We convinced ourselves that every single line must be mathematically precise, rigid, and anatomically flawless.
But here is the secret that professional artists whisper to each other in dark corners: the most captivating, alive, and breathtaking drawings are not the ones that look like a sterile camera photograph. They are the ones that breathe. They are the ones built with light, expressive, and incredibly loose strokes.
If you want to rescue your creativity from the death grip of perfectionism, you have come to the right place. Let’s look at how you can loosen up your hand, free your mind, and rediscover the magic of drawing with complete freedom.
The Parable of the Overpacked Suitcase: Why Tight Drawings Suffocate
To understand why we need loose strokes, we have to look at why we get so stiff in the first place. Think about the last time you went on a weekend trip. You probably packed a tiny suitcase, but then panic set in. “What if it rains? What if I fall into a mud puddle? What if I get invited to a black-tie gala at the local diner?”
So, you stuffed six pairs of pants, four sweaters, three pairs of shoes, and an entire blender into a carry-on bag. You had to physically sit on the suitcase just to zip it shut. When you arrived at your destination and opened it, everything was a wrinkled, unreadable mess. You couldn’t find what you actually needed because there was simply too much chaotic pressure inside.
A stiff, overly controlled drawing is exactly like that overpacked suitcase. When you try to force every single microscopic detail into a sketch from the very first second, you suffocate the life out of it. Your lines become heavy, dark, and permanent. If you accidentally misplace a leg or tilt a face too far to the left, you cannot fix it without ruining the entire page.
Loose sketching acts like a beautifully organized, light backpack. It gives your drawing room to breathe. When you start with light, exploratory strokes, you are not committing to anything just yet. You are casually looking around the room, testing the waters, and seeing where the shapes want to live. You allow the drawing to evolve naturally, rather than forcing it into a straightjacket before it even has a chance to stand up.
Step 1: Loosen Your Physical Grip (Unclench That Fist!)
Let’s start with the physical mechanics of drawing. If you watch someone who is struggling with a stiff drawing style, you will notice a common theme: they are holding their pencil exactly like they are signing a legal contract. Their fingers are clamped right down by the graphite tip, their wrist is locked solid against the table, and they are moving their pencil using only the tiny, panicked joints of their fingers.
Imagine trying to drive a car, but you are only allowed to move the steering wheel by one millimeter at a time using your index finger. You would crash into a mailbox within thirty seconds.
To get beautiful, sweeping, energetic lines, you need to change your relationship with your pencil:
- Move up the handle: Slide your hand back. Way back. Hold the pencil right in the middle, or even near the very end.
- Lighten the pressure: Hold it so gently that if someone walked by and plucked the pencil out of your hand, it would slide out with zero resistance.
- Engage the whole arm: Lock your wrist and fingers into a comfortable, relaxed position, and drive the movement from your elbow and your shoulder.
Try this right now on a scrap piece of paper. Don’t draw an object. Just draw giant, sweeping circles across the entire page using your shoulder. Feel how much smoother, rounder, and easier those shapes become when you let your whole arm join the party? It feels like ice skating on paper. Those are the foundation lines of a truly liberated sketch.
Step 2: The “Ghost Stroke” Method
Have you ever watched a professional golfer or a tennis player right before they hit the ball? They don’t just stand there frozen and then suddenly whack it. They stand over the ball and take three or four gentle, rhythmic practice swings in the empty air. They are teaching their muscles the exact path the club needs to take before making contact.
You can do the exact same thing with your artwork. It is a magical little technique called the “Ghost Stroke.”
Before your pencil ever touches the physical paper, hover the tip about half an inch above the page. Move your entire arm in the motion of the shape you want to create. If you are drawing a coffee mug, hover over the paper and trace the oval of the rim in the air a few times. Get the rhythm into your elbow. Feel the speed.
Once your arm knows the path, gently lower the pencil until it just barely whispers against the surface of the paper. Let it spin around two or three times, creating incredibly faint, overlapping circles.
Don’t worry if the circles aren’t perfect. Those multiple, light lines actually create an optical illusion for the human eye. When someone looks at a collection of five or six faint, loose lines tracing a shape, their brain automatically averages them out and sees a perfectly smooth, dynamic curve. It is a brilliant shortcut that takes all the pressure off your shoulders.
Step 3: Embrace the “Ugly Stage” of Creativity
Every single magnificent thing ever created by human hands goes through an absolutely horrific ugly stage.
Think about baking a cake. Halfway through the process, it is just a warm, gooey, beige sludge sitting in a metal bowl. If you looked at it then, you would think, “This looks terrible, I should throw this in the trash.” But you don’t do that because you understand that the sludge is a mandatory phase on the path toward chocolate buttercream perfection.
Houses look like chaotic skeleton cages of timber before the drywall goes up. High-end fashion looks like weird, pinned-together rags before the final seams are sewn. Yet, for some strange reason, we expect our drawings to look like a finished masterpiece within the first thirty seconds of planning.
When you start a drawing with light, loose markings, it will look messy. It will look like a chaotic web of faint geometric shapes, faint scratches, and confusing circles. That is exactly how it is supposed to look.
Embrace the mess! Give yourself permission to make a terrible drawing. In fact, challenge yourself to write off the first ten minutes of any sketch session as a total playground. Tell yourself, “I am just playing with shapes, and no one is ever going to see this.” When you remove the threat of judgment, your hand instantly relaxes, your strokes soften, and the real magic begins to leak out onto the page.
Step 4: Work Fast to Outrun Your Inner Critic
We all have an inner critic. Mine is a grumpy, judgmental little person who sits on my shoulder and sighs loudly whenever I make a line that isn’t perfectly straight. Your critic might tell you that you lack talent, that you started too late in life, or that your perspective is completely broken.
Do you know what the inner critic’s greatest weakness is? It is incredibly slow.
The inner critic needs time to analyze your work, compare it to your expectations, formulate a mean comment, and deliver it to your brain. If you draw slowly and deliberately, you give that critic all the time they need to set up camp and ruin your mood.
But if you work fast? You can leave that critic eating your dust in the rearview mirror.
Try setting a timer on your phone for sixty seconds. Pick an object in your room—a shoe, a houseplant, a crumpled soda can—and force yourself to draw the entire thing before the alarm goes off. Because you only have one minute, you physically do not have time to sit there adjusting a tiny line over and over. You are forced to look at the big picture, drop down big, structural shapes, and use rapid, energetic lines to capture the essence of the object.
When the timer rings, look at the result. Is it anatomically flawless? Probably not. But does it have a wild, vibrating energy that makes it look alive? Absolutely. You caught the soul of the object because you didn’t let your brain get in the way of your hand.
Step 5: Transitioning from Loose to Foundational
Now, you might be thinking, “This all sounds lovely, but eventually, I do want my drawing to look like a real object, not just a cloud of faint circles.”
This is where the beautiful dance of drawing comes into play. Loose drawing isn’t about leaving your sketch looking like an unmade bed forever. It is about using that initial freedom to build a rock-solid foundation for your final details.
Think of your drawing like building a house:
- The Scaffold (The Loose Phase): You use your long grip, your shoulder movement, and your ghost techniques to lightly map out the entire composition. You mark where the top hits, where the bottom sits, and the basic geometric weights.
- The Evaluation: You step back. Because your lines are so light, you can easily see if the proportions feel right. If the head is too big, you don’t even need to erase it. You just lightly sketch the correct size right over the top. The old lines will simply fade into the background.
- The Bricks (The Defined Phase): Once you are happy with the general placement, you can slide your hand forward on the pencil, closer to the tip. Now, you can apply a bit more pressure. Look through your beautiful, messy web of loose lines, find the “true” edges you want to keep, and trace over them with confident, darker markings.
The final drawing will have the structural accuracy of a carefully planned artwork, but it will retain that electric, joyful energy from the loose under-drawing. It gives the viewer a peek behind the curtain, showing them the journey your hand took to get to the final piece.
Your Creative Permission Slip
At the end of the day, drawing is not a test you can fail. It is a conversation between your eyes, your heart, and the paper. There are no art police waiting outside your door to arrest you if a line goes askew or if your sketches look a little chaotic.
The next time you pick up a pencil, take a deep breath. Drop your shoulders away from your ears. Unclench your teeth. Slide your fingers down the barrel of that pencil, unlock your elbow, and let your hand dance across the page.
Give yourself permission to play, to mess up, and to explore. Master the art of the light, joyful stroke, and watch your creative confidence soar to heights you never thought possible. Now, stop reading, go find a piece of paper, and go make a magnificent, beautiful mess!