
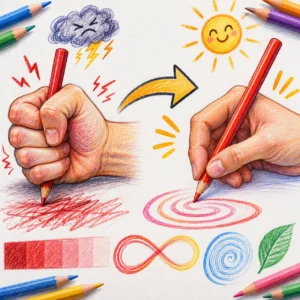
Have you ever looked down at your hand halfway through a drawing and thought, “Why am I holding this pencil like it owes me money?”
Your knuckles are white. Your thumb is working overtime. Your wrist has quietly submitted its resignation letter. Meanwhile, the pencil is sitting between your fingers wondering what crime it committed.
Welcome to the infamous death grip.
It happens to beginners. It happens to experienced artists. It happens when you desperately want a straight line, a perfect circle, or that one tiny detail to finally look right.
So you squeeze harder.
Naturally, the line gets worse.
You squeeze even harder.
Now your hand hurts.
And somehow the circle looks like a potato.
If this sounds familiar, don’t panic. Your drawing ability probably isn’t the problem. Your Pencil Grip may simply be making your job much harder than it needs to be.
Drawing isn’t a wrestling match between your hand and a piece of graphite. You don’t have to dominate the pencil into submission. Good drawing control usually comes from a combination of relaxed movement, appropriate pressure, practice, and knowing when to let your fingers, wrist, elbow, or shoulder do the work.
Let’s loosen that fist and teach your hand a better way to draw.
Why Your Pencil Grip Matters
Think about how you normally write your name.
Your pencil is probably close to the tip. Your fingers make tiny movements. Your wrist may rest on the page. Everything is compact and controlled.
That’s perfectly useful for writing.
But drawing is a much bigger playground.
If you’re sketching a large circle, outlining a figure, drawing a landscape, or creating long flowing curves, relying entirely on your fingers can make your movements feel cramped.
A relaxed Pencil Grip gives you more freedom to change the size, direction, pressure, and character of your marks.
Artists commonly switch between different grips depending on what they’re drawing. A tripod-style grip can be useful for small details and precise marks, while an overhand grip can make larger, looser strokes easier.
The important word here is switch.
There isn’t a magical grip that must be used for every single line in every drawing.
Your pencil isn’t a toothbrush.
You don’t have to hold it the exact same way from beginning to end.
First Rule of Pencil Grip: Stop Squeezing
Before we get into exercises, perform a quick experiment.
Hold your pencil normally.
Now squeeze it as hard as you comfortably can.
Notice what happens.
Your fingers stiffen. Your wrist becomes tense. Your forearm joins the party. You may even notice yourself holding your breath.
Now loosen your fingers.
Don’t drop the pencil. Just reduce the pressure.
That’s the sweet spot you’re looking for.
A useful drawing grip should feel secure but relaxed. Your pencil shouldn’t feel as though it’s about to escape, but it also shouldn’t be trapped in a maximum-security prison.
If you can move the pencil while keeping your fingers relatively relaxed, you’re heading in the right direction.
And remember: comfort matters. Artists naturally develop different grips, and what works beautifully for one person may feel awkward to another.
Warm-Up #1: The Phantom Piano
Before asking your hand to draw beautiful things, give it thirty seconds to remember that it has joints.
Hold both hands comfortably in front of you.
Imagine there’s an invisible piano sitting underneath your fingers.
Now play it.
Wiggle your fingers gently, lifting and lowering them one after another.
Don’t turn this into an Olympic event. You aren’t trying to play Beethoven at lightning speed.
Just keep the movement loose.
Do this for about 30–40 seconds.
Then shake your hands gently.
The purpose isn’t to magically transform your drawing ability. It’s simply a reminder to move your fingers instead of keeping them frozen in one position.
If your hand already feels painful or unusually stiff, don’t force the exercise. Warm-ups should feel comfortable, not like punishment.
Warm-Up #2: Thumb Circles
Your thumb plays a major role in controlling a pencil, so let’s give it some attention.
Relax your drawing hand.
Move your thumb slowly in a circle.
Make five circles clockwise.
Then five in the opposite direction.
Keep the rest of your hand relaxed.
The goal isn’t strength.
It’s awareness.
You are teaching yourself to notice how much unnecessary tension you’re carrying in your hand.
Sometimes the biggest improvement isn’t learning a new technique.
It’s realizing how much tension you’ve been using unnecessarily.
Exercise #3: The Loose Pencil Test
Grab your pencil and hold it in your usual drawing position.
Now slowly move your fingers farther away from the tip.
Try drawing a few long lines.
Then move your grip back toward the tip and draw a few shorter lines.
Notice the difference.
When you hold farther back, the pencil may feel less precise at first, but your movements can become broader and freer.
When you move closer to the tip, you gain more control for smaller marks.
This simple exercise teaches an important lesson:
Your grip can change depending on the job.
You don’t need to force one grip to do everything.
Exercise #4: Ghost Circles
Here’s where things get fun.
Take a piece of inexpensive paper.
Don’t use your precious sketchbook. That blank, expensive page has enough psychological pressure already.
Hover your pencil slightly above the paper.
Now draw a large circle in the air.
Don’t worry about perfection.
Move your arm smoothly and repeatedly.
Once the motion feels comfortable, lower the pencil and draw the circle on the paper.
Try again.
And again.
Make the circles large.
The goal isn’t to produce a page of perfect circles worthy of mathematical certification.
The goal is to teach your arm the movement before you commit it to paper.
This technique can be particularly useful when practicing larger shapes because it encourages you to think about the movement rather than obsessing over every millimeter.
Try doing some circles with a relaxed tripod-style grip and others with an overhand grip.
You’ll quickly discover which movement feels more natural for different sizes.
Exercise #5: The Infinity Highway
Draw a large infinity symbol across the page.
Now trace it repeatedly.
Keep your movements smooth.
Don’t stop at the center.
Don’t suddenly attack the corners.
Let your pencil travel continuously.
After a few repetitions, experiment with pressure.
Make one side darker.
Then gradually lighten your pressure as you cross the center.
Make the other side darker again.
You’re practicing something extremely useful here: pressure control.
Good drawing isn’t always about producing dark lines.
Sometimes the best line is barely there.
Sometimes you want a bold edge.
Sometimes you want something in between.
Your hand needs to learn all three.
Exercise #6: The Five-Step Shading Ladder
Draw a long rectangle.
Divide it into five sections.
Your first section should be very dark.
The second should be slightly lighter.
The third should sit somewhere in the middle.
The fourth should be light.
The fifth should be extremely light.
Now here’s the challenge:
Don’t try to create every value by squeezing harder.
Instead, experiment with your grip, pencil angle, stroke direction, and pressure.
For lighter marks, hold the pencil more loosely and use gentle strokes.
For darker marks, you can move closer to the tip and deliberately increase pressure.
You’re learning that pressure is a tool, not a punishment.
And if you are using a soft graphite pencil, you may find that you can achieve dark values without pressing nearly as aggressively as you expected.
Exercise #7: The One-Minute Line Challenge
Set a timer for one minute.
Draw as many straight lines as you comfortably can.
But there’s a catch.
Don’t try to make every line perfect.
Instead, focus on making each line confident.
Start at one point.
Look toward where you want the line to end.
Then move your arm toward that destination.
You may produce some questionable lines.
Excellent.
That’s the point.
You’re practicing movement rather than hesitation.
Many shaky lines happen because we slowly creep across the page while constantly checking whether we’re still on course.
It’s like trying to walk in a straight line while staring at your feet every two seconds.
Sometimes you need to trust the movement.
Exercise #8: Draw From Different Joints
Here’s a simple experiment that can completely change how drawing feels.
Draw a small circle using mostly your fingers.
Now draw a medium circle using more wrist movement.
Finally, draw a large circle using your elbow and shoulder.
Notice how different each one feels.
Small movements naturally suit smaller shapes.
Larger movements become more comfortable when you involve more of your arm.
This is one reason artists often practice making large marks from the shoulder. It gives the arm room to move rather than forcing every stroke through tiny finger movements.
You don’t need to eliminate finger movement.
You simply want to avoid making your fingers responsible for everything.
Think of your arm as a team.
Your fingers handle the tiny details.
Your wrist helps with controlled movements.
Your elbow helps with larger arcs.
Your shoulder helps with broad gestures.
Everyone gets a job.
Nobody has to work a double shift.
Exercise #9: The Chopstick Challenge
Now we’re leaving the sketchbook for a moment.
Grab a pair of chopsticks.
Place a few small objects on a table — beans, paper scraps, or other harmless lightweight objects.
Try picking them up and moving them into a small pile.
Why?
Because chopsticks are surprisingly good at exposing excessive force.
Squeeze too hard and they become awkward.
Use too little control and the object falls.
You have to find that middle ground.
That same idea applies to your pencil.
You want enough pressure to control the tool without turning your hand into a hydraulic press.
This kind of fine-motor practice can also make you more aware of how your fingers coordinate small movements. Fine-motor activities such as manipulating small objects are commonly used to practice hand coordination and dexterity.
Exercise #10: The Coin Shuffle
Grab a coin.
Place it between your thumb and fingers.
Now try moving it from your fingertips toward your palm and back again.
Don’t worry if you drop it.
The coin has survived worse.
The point is to practice subtle finger movements.
Try moving it slowly.
Then slightly faster.
Then switch directions.
This isn’t specifically an art exercise, but it gives you an opportunity to become more conscious of finger coordination.
And that awareness can carry over when you’re adjusting your pencil.
What Should a Good Pencil Grip Feel Like?
Forget what it looks like for a moment.
Ask yourself how it feels.
A useful Pencil Grip should generally feel:
- Relaxed rather than painfully tight
- Stable rather than slippery
- Flexible rather than rigid
- Comfortable enough to maintain for a reasonable drawing session
- Adaptable when you change tasks
- Free enough to let your fingers, wrist, elbow, and shoulder move
You should be able to change pressure without feeling as though your entire hand has to participate.
You should also be able to reposition the pencil without fighting your own fingers.
Most importantly, drawing shouldn’t regularly leave you with significant pain.
Try the Pencil Tug Test
Here’s a funny little experiment.
Hold your pencil as though you’re drawing.
Ask a friend to give it a very gentle tug.
If the pencil refuses to move because you’ve clamped onto it like a crocodile, that’s a clue that your grip may be too tight.
If it slips out immediately, you’ve gone too far in the other direction.
You’re looking for a comfortable middle ground.
Of course, don’t actually turn this into a tug-of-war.
Your pencil has suffered enough.
Don’t Forget Your Breathing
This sounds almost ridiculous until you catch yourself doing it.
You’re drawing a difficult line.
You lean forward.
Your shoulders rise.
Your eyes narrow.
Your lips disappear into a serious little line.
And suddenly you’re holding your breath like you’re defusing a bomb.
Relax.
Breathe normally.
Lower your shoulders.
Try the line again.
Tension can spread through your body when you’re concentrating intensely, so taking short pauses and checking your posture and grip can help keep your drawing sessions more comfortable.
For longer sessions, ergonomic guidance also emphasizes a relaxed wrist, appropriate posture, and regular breaks.
Is There One Perfect Pencil Grip?
No.
And this is important.
You will find plenty of people online passionately arguing about the “correct” way to hold a pencil.
Meanwhile, another artist is probably drawing an incredible portrait while holding their pencil in a way that would make a handwriting teacher faint.
Different grips serve different purposes.
The tripod grip is useful for precise, detailed work.
The overhand grip can be useful for broader strokes and shading.
Other artists develop variations that suit their hand, medium, paper, and style.
The goal isn’t to win the World’s Most Correct Pencil Holder award.
The goal is to find a grip that gives you control, flexibility, and comfort.
A Five-Minute Pencil Grip Routine
You don’t need to spend an hour every day doing finger gymnastics.
Try this simple routine before drawing:
30 seconds: Phantom Piano
30 seconds: Thumb circles
1 minute: Large ghost circles
1 minute: Infinity loops
1 minute: Straight-line practice
1 minute: Light-to-dark pressure exercises
That’s it.
Five minutes.
Then start drawing.
After a few weeks, you may notice something interesting.
You stop thinking about your grip quite so much.
Your hand begins to adjust naturally.
You hold the pencil farther back when making broad marks.
You move closer when working on details.
You relax your fingers when your lines need to flow.
That’s the real goal.
You don’t want to spend your entire artistic life thinking, “Am I holding my pencil correctly?”
Eventually, you want the answer to become:
“I don’t know. I’m too busy drawing.”
The Biggest Pencil Grip Mistake? Trying Too Hard
There’s a funny contradiction in drawing.
When we want better control, we often create more tension.
We squeeze.
We slow down.
We stare at the line.
We try to control every millimeter.
And the result is often a line that looks terrified.
Instead, think of drawing as controlled movement rather than forced movement.
Relax your hand.
Choose the grip that suits the task.
Let larger shapes come from larger movements.
Use your fingers for the details that actually require them.
Experiment with pressure.
Take breaks.
And most importantly, practice without demanding perfection from every single stroke.
A bad circle isn’t a disaster.
A wobbly line isn’t evidence that you’re not an artist.
It’s just a line.
Draw another one.
Then another.
Eventually, your hand starts understanding what your brain has been asking it to do all along.
Final Thoughts: Unclench That Hand
Your pencil isn’t your enemy.
It doesn’t need to be crushed into submission.
And your drawing doesn’t need to be created with the hand strength of someone opening a jar that hasn’t been touched since 1997.
A relaxed Pencil Grip can give you more freedom to experiment with line, pressure, movement, and detail. Different grips can serve different purposes, and learning to switch between them can make drawing feel considerably more natural.
So the next time your hand starts turning into a miniature concrete claw, stop.
Drop your shoulders.
Take a breath.
Loosen your fingers.
Move the pencil farther back.
Draw a ridiculous circle.
Then draw another.
Your goal isn’t to control every line through sheer force.
Your goal is to learn when to guide, when to relax, and when to let your arm move.
Because great drawing control doesn’t always come from gripping harder.
Sometimes, it comes from finally letting go.
References
A practical guide covering relaxed grips, overhand and tripod grips, and drawing from the arm.
Useful artist-focused instruction on tripod and overhand grips.
Discussion of different drawing grips and movements from the wrist and elbow.