
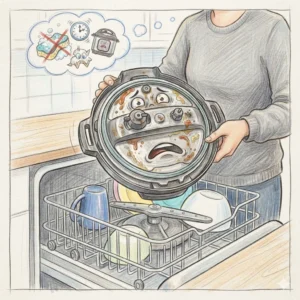
There are two kinds of people in the kitchen: those who genuinely enjoy washing dishes and those who consider the dishwasher one of the greatest inventions in human history.
If you belong to the second group, you have probably stood in front of your dishwasher after cooking with an Instant Pot and wondered:
“Can I just put the whole lid in there?”
Honestly, we understand the temptation.
You have just made honey garlic chicken, chili, curry, soup, pulled pork, or some other delicious creation in your pressure cooker. Dinner took surprisingly little effort, but now the lid is covered with tiny splashes of sauce, steam residue, and mysterious little food particles hiding around the valves.
Meanwhile, your dishwasher is sitting there looking suspiciously helpful.
The good news is that, for many Instant Pot models, the lid and its accessories are dishwasher safe on the top rack. Instant Pot’s official cleaning guidance specifically says the lid and its accessories can go on the top rack, while the inner cooking pot is also dishwasher safe.
So yes, your dishwasher can absolutely become your cleanup assistant.
But there is a little more to the story.
Your Instant Pot lid isn’t an ordinary pot lid. It contains the sealing ring, float valve, steam-release components, and other parts involved in pressure cooking. Those components need to be clean, correctly assembled, and in good condition before your next cooking session.
Let’s break down exactly how to clean your pot lid, when the dishwasher is your best friend, and when a quick hand wash makes more sense.
Is an Instant Pot Lid Dishwasher Safe?
Generally, yes.
Instant Pot’s current FAQ states that the steam rack, lid, and lid accessories are top-rack dishwasher safe, while the inner pot is dishwasher safe as well. Several current Instant Pot product pages also specifically describe their pressure-cooker lids as dishwasher safe.
That means you don’t need to stand at the sink every night painstakingly scrubbing your lid by hand.
However, there is one important rule:
Top rack. Always check your model’s instructions.
The top rack is the safest general placement because it keeps the lid away from the dishwasher’s lower heating element.
And remember that Instant Pot has released many different models over the years. Some newer designs have different lid systems and components. The manufacturer’s instructions for your exact model should always win if they differ from general advice.
In other words, don’t assume every pressure-cooker lid from every brand can be treated exactly like an Instant Pot lid.
Why Is the Lid More Complicated Than It Looks?
At first glance, an Instant Pot lid looks like a simple metal disk.
It isn’t.
Underneath that innocent-looking lid is a collection of small components that work together to make pressure cooking possible.
1. The Sealing Ring
The silicone sealing ring sits around the inside of the lid and creates the seal necessary for pressure to build.
This little ring is incredibly important.
If it becomes stretched, damaged, deformed, or incorrectly installed, your cooker may not seal properly. Instant Pot recommends checking the sealing ring before cooking and replacing it if it shows damage or deformation. The company also recommends replacing sealing rings every 12–18 months or sooner when necessary.
Interestingly, genuine Instant Pot replacement sealing rings are themselves dishwasher safe.
2. The Float Valve
This is the little metal pin that rises when pressure builds inside the cooker.
It is small, but don’t underestimate it.
The float valve is part of the pressure-safety system, so it needs to move properly and have its silicone cap in good condition. Instant Pot specifically advises checking that the float valve is properly attached and that the silicone cap isn’t damaged.
3. The Steam-Release Component
This is the part that allows pressure to be released from the cooker.
Because steam needs a clear path to escape, food residue around this area isn’t something you want to ignore.
4. The Anti-Block Shield
The underside of many Instant Pot lids includes an anti-block shield that helps prevent food particles from obstructing the steam-release pathway.
Rice, oatmeal, beans, sauces and other foods can leave behind little particles, which is why occasionally checking these components is much more important than simply making the lid look shiny.
How to Put Your Pot Lid in the Dishwasher
Now for the easy part.
If your specific Instant Pot model identifies the lid as dishwasher safe, here’s the practical approach.
Step 1: Let Everything Cool Down
Don’t rush from pressure cooking directly to cleaning.
Make sure the cooker has completely depressurized before removing the lid. Never attempt to open a pressure cooker while it is still under pressure. Instant Pot emphasizes that opening a pressurized cooker can result in injury or property damage.
Once the pressure is fully released, remove the lid.
Step 2: Give the Lid a Quick Inspection
Before placing it in the dishwasher, take a few seconds to look around.
Check for:
- Food stuck around the sealing ring
- Residue around the steam-release area
- Food particles near the float valve
- Anything blocking a vent
- Damage to the silicone components
You don’t need to perform a forensic investigation every night. A quick visual check is enough for routine cleaning.
Step 3: Place the Lid on the Top Rack
This is the big one.
Put the Instant Pot lid on the dishwasher’s top rack.
Instant Pot’s cleaning guidance specifically identifies the lid and its accessories as top-rack dishwasher safe.
Position it securely so it won’t fall through the rack or interfere with the dishwasher’s spray arms.
Step 4: Wash the Accessories According to Your Model
If your model’s instructions say the removable lid accessories are dishwasher safe, they can be cleaned according to those instructions.
Don’t assume, however, that every part of every Instant Pot model is removable or dishwasher safe.
This matters because Instant Pot has different lid designs. For example, the company notes that the sealing ring on the Duo Crisp with Ultimate Lid is permanently attached to its pressure-cooking cover and isn’t designed to be removed.
So before taking apart anything, check your model’s manual.
Step 5: Let Everything Dry Completely
Once the dishwasher finishes, give the lid and components time to dry.
Instant Pot recommends ensuring parts are dry before storage.
This is especially helpful if moisture collects around the lid components.
Do You Need to Remove the Silicone Ring Before Washing?
This is where many online cleaning tips become unnecessarily complicated.
For standard Instant Pot models with removable sealing rings, the ring can generally be washed as directed by the manufacturer, and Instant Pot lists its genuine replacement sealing rings as dishwasher safe.
But don’t automatically remove every component simply because someone online told you to.
Different Instant Pot models use different lid designs.
The safest rule is:
If the component is designed to be removable and the manual says it can go in the dishwasher, follow those instructions. If it isn’t designed to be removed, leave it alone.
This is particularly important for newer lid designs.
The Real Problem: That Silicone Ring Smell
Let’s talk about something every frequent pressure-cooker user eventually discovers.
Silicone remembers.
You can cook garlic chicken on Monday, beef stew on Wednesday and cheesecake on Friday, and somehow Friday’s cheesecake starts whispering, “I remember the garlic.”
Silicone sealing rings can retain food odors.
Instant Pot itself acknowledges that changing sealing rings can help avoid discoloration and odors, and its two-pack sealing rings are specifically marketed as an option for separating sweet and savory foods.
That’s why many people keep separate rings for different types of cooking.
Try a Two-Ring System
You can keep:
Ring #1: Savory foods
Curries, chili, meat, garlic, onions and stews.
Ring #2: Sweet or neutral foods
Rice, yogurt, desserts and other delicate flavors.
It is an incredibly simple trick.
Your vanilla cheesecake doesn’t need to taste like last Sunday’s biryani.
Should You Wash the Pot Lid by Hand Instead?
Absolutely.
Even though the dishwasher is convenient, hand washing can be faster when the lid only has a little residue.
Imagine you’ve just made plain rice.
The lid isn’t exactly filthy. It has a little condensation and perhaps a few grains stuck around the edge.
Running a dishwasher cycle for that seems slightly dramatic.
Instead:
- Let the cooker depressurize completely.
- Remove the lid.
- Rinse away loose food.
- Use warm water and mild dish soap.
- Wipe accessible surfaces with a soft sponge.
- Check the valves and vents for visible residue.
- Rinse thoroughly.
- Allow the lid to dry completely.
Done.
Sometimes the easiest cleaning method is simply the one that takes less time.
When the Dishwasher Makes More Sense
On the other hand, the dishwasher becomes your best friend after particularly messy meals.
Think:
- Thick chili
- Creamy pasta
- Sticky sauces
- Greasy meat dishes
- Beans
- Curries
- Tomato-based dishes
- Oatmeal
- Foods that splatter during cooking
These meals have a special talent for getting food into places you didn’t even know existed.
That’s when putting your dishwasher-safe lid and accessories on the top rack can save you from standing at the sink with a tiny brush wondering where your life went.
What About the Instant Pot Base?
This is the part you do not put in the dishwasher.
The cooker base contains the electrical components, heating element and control panel.
Instant Pot recommends cleaning the cooker base by wiping the inside of the outer pot and condensation rim with a barely damp cloth, while the control panel and base should also be cleaned with a soft, barely damp cloth or sponge.
So remember:
Lid: Dishwasher safe on the top rack for models that specify it.
Inner pot: Dishwasher safe.
Cooker base: Wipe clean. Do not put it in the dishwasher.
That distinction could save you from turning a beloved kitchen appliance into a very expensive countertop decoration.
Common Cleaning Mistakes to Avoid
Don’t Put the Cooker Base in the Dishwasher
This is the biggest mistake.
The electrical base is not a washable dish.
Don’t Ignore the Sealing Ring
A ring can look perfectly normal while becoming stretched or damaged.
Inspect it regularly. Instant Pot recommends replacing it when damaged or deformed and generally replacing it every 12–18 months or sooner as needed.
Don’t Block or Ignore the Steam-Release Path
Food residue around the steam-release system deserves attention.
A pressure cooker depends on these components functioning correctly.
Don’t Use Damaged Components
If a silicone cap, sealing ring, valve or other pressure-related component is damaged, don’t simply hope it will survive another cooking session.
Replace the appropriate component before using the cooker again.
Don’t Follow Generic Advice Over Your Model’s Manual
This might be the most important tip of all.
Your Instant Pot may look almost identical to someone else’s, but its lid mechanism can be different.
The manufacturer’s instructions for your exact model should always take priority.
How Often Should You Clean the Lid?
After every use.
That doesn’t necessarily mean you need to perform a deep clean every evening.
For ordinary cooking:
Quick clean: Rinse, wipe, inspect and dry.
For messy meals:
Deep clean: Wash the lid and dishwasher-safe accessories thoroughly and inspect the valves and sealing components.
For recurring smells:
Odor management: Consider dedicated sealing rings for savory and sweet foods.
For worn components:
Replace them: Don’t wait until a damaged ring or cap becomes a cooking problem.
Instant Pot’s own guidance recommends cleaning the cooker and its parts after each use and routinely inspecting components for damage or wear.
The Bottom Line: Dishwasher or Sink?
So, can you put your Instant Pot pot lid in the dishwasher?
Yes—if your particular Instant Pot model says the lid is dishwasher safe, place it on the top rack.
That’s the simple answer.
You don’t need to fear your dishwasher. In fact, Instant Pot explicitly says the lid and its accessories are top-rack dishwasher safe for its applicable models.
But don’t treat your pressure cooker like an ordinary saucepan.
The lid contains important pressure-related components. Keep them clean, inspect them regularly, make sure they’re correctly installed, and replace damaged parts when necessary.
And when the lid only needs a quick rinse? Don’t feel guilty about washing it by hand.
Sometimes the most efficient kitchen hack isn’t an elaborate cleaning routine.
It’s simply doing the two-minute wash before the sauce has time to become cement.
Final Thought
The whole reason we love an Instant Pot is convenience.
It gives us tender meat without hours of simmering, quick meals on busy evenings, and the ability to throw dinner together when our schedules are doing their absolute best to ruin our plans.
Cleaning shouldn’t completely cancel out that convenience.
So the next time you finish dinner and stare at your messy pressure-cooker lid, remember: the dishwasher may be perfectly capable of handling it.
Put the dishwasher-safe lid on the top rack, keep the electrical base far away from the water, pay attention to the sealing ring and valves, and follow the cleaning instructions for your specific model.
Then close the dishwasher door.
Walk away.
You cooked dinner.
You’ve earned the right to let a machine handle the dishes.
References
Instant Pot — Frequently Asked Questions