
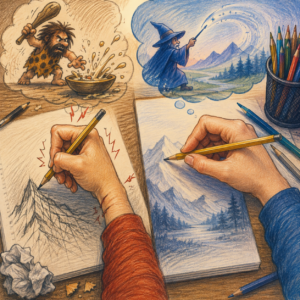
If you have ever finished a drawing session and discovered that your hand feels like it has personally fought a war, welcome to the club.
Maybe your fingers are stiff. Your wrist feels strangely sore. Your shoulder is creeping toward your ear. And your pencil? It has somehow acquired a permanent dent where your fingers have been squeezing it for dear life.
You might even look at the drawing and think, Why does this feel harder than it should?
Here is the good news: the problem may not be your drawing ability at all. It may simply be how you are holding your pencil.
Watch experienced artists for a while and you will notice something interesting. They do not always grip a pencil the way most of us were taught to hold one for writing. They move their hands farther back, change grips depending on the task, loosen their fingers, and often involve their entire arm rather than making every mark with tiny finger movements.
That does not mean there is one magical grip that every professional artist uses. There isn’t. Artists change their grip depending on what they are drawing, how much control they need, the size of the paper, and whether they are sketching, shading, or adding tiny details.
But understanding these different grips can completely change the way drawing feels.
So let’s put your poor wrist out of its misery and explore how Professional Artists hold their pencils—and why you may want to stop strangling yours.
Why Your Normal Writing Grip Can Make Drawing Exhausting
Think about how you hold a pencil when writing your name.
Your thumb and index finger pinch the pencil while the middle finger supports it. Your hand stays relatively close to the tip, and your fingers make small, precise movements.
For writing, this is brilliant.
You can form tiny letters, control individual strokes, and squeeze into the smallest space on a form without accidentally writing across the entire page.
But drawing is a different animal.
Imagine trying to draw a giant tree using the same movements you use to write a grocery list.
Your hand would be doing hundreds of tiny movements just to create one branch.
This is where beginners often get trapped.
They believe more control equals better drawing, so they grip the pencil tightly and move only their fingers. Unfortunately, more control can quickly turn into more tension.
Your lines become short and hesitant. Your wrist stays locked. Your shoulders tighten. And after twenty minutes, your hand looks like it is preparing to file a complaint with management.
Professional Artists understand something important: control does not always come from gripping harder.
Sometimes, better control comes from loosening your grip and allowing more of your arm to participate.
The Overhand Grip: Your New Drawing Superpower
One of the most useful alternatives is the overhand grip.
Instead of holding the pencil like a writing instrument, turn your hand so your palm faces more toward the paper. The pencil rests underneath your hand, with your thumb and fingers helping guide it.
The exact position can vary, but the basic idea is simple:
Your hand is no longer hovering tightly around the pencil tip.
Instead, you are holding the tool farther back and allowing your arm more freedom.
Artists Network describes the overhand position as useful for creating a broader range of strokes, including lighter and wider marks made with the side of the pencil.
And this is where things get exciting.
When you turn the pencil slightly and use the side of the graphite instead of just the sharp point, you can cover larger areas quickly.
Suddenly, shading a cheek, blocking in a shadow, or sketching a large tree trunk doesn’t require a million tiny pencil strokes.
One broad movement can do the job.
It is almost like upgrading from painting a wall with a toothbrush to using an actual paint roller.
Why Holding the Pencil Farther Back Helps
Here is a wonderfully simple experiment.
Take your pencil and hold it normally, close to the tip.
Now draw a line.
Next, slide your fingers several centimeters farther back and draw another line.
Did you notice the difference?
You probably had less precise control with the second grip—but your movement may also have felt lighter and more relaxed.
That is not an accident.
Moving your fingers farther from the point generally reduces the amount of pressure and fine control you can apply. The result is often a looser, lighter mark. Artists Network specifically recommends moving the grip farther back when you want looser line work and broader marks.
This is extremely useful during the early stages of a drawing.
Instead of obsessing over whether the curve of a nose is perfect, you can lightly explore the shape.
Instead of trying to draw the perfect circle on the first attempt, you can build the shape with several relaxed strokes.
Instead of thinking, This line has to be perfect!, your brain starts thinking, I’m just figuring things out.
And that mindset is incredibly valuable.
The Extended Tripod Grip: The Middle Ground
Maybe the overhand grip feels strange.
That’s normal.
You have spent years learning to hold a pencil for writing, so suddenly flipping your hand over can feel like you’ve been handed the controls to a helicopter.
If you want something more familiar, try the extended tripod grip.
It looks similar to your normal writing grip, but instead of placing your fingers right beside the pencil tip, move them farther back along the barrel.
That’s it.
No dramatic transformation.
No chanting required.
No expensive art school required.
You simply create more distance between your fingers and the point.
This gives you a useful balance between control and freedom.
You can still create relatively precise lines, but you are less likely to squeeze the pencil with excessive force.
Think of it as putting your hand into “cruise control” rather than “emergency landing.”
Professional Artists Change Their Grip Depending on the Job
One of the biggest misconceptions about pencil grip is that you are supposed to choose one grip and use it for everything.
Professional Artists generally don’t work that way.
Different marks require different approaches.
Need tiny details?
Move closer to the tip.
The traditional writing-style grip gives you greater precision, making it useful for small details, controlled outlines, eyelashes, hair strands, tiny textures, and other areas where accuracy matters.
Need broad shading?
Move farther back.
The overhand grip gives you access to the side of the graphite and makes larger, lighter strokes easier.
Need loose construction lines?
Try an extended grip.
Holding the pencil farther back allows you to explore shapes without immediately committing to dark, permanent-looking marks.
Need expressive strokes?
Experiment.
Turn the pencil. Change your wrist position. Move your arm. Try the side of the graphite.
Artists Network notes that artists can transition between writing and overhand grips depending on the type of mark they want to make.
In other words, your pencil grip is not a marriage.
You are allowed to change it.
The Shoulder Is Secretly Doing More Work Than You Think
Now we get to one of the biggest differences between tight beginner drawing and relaxed drawing:
Where the movement comes from.
If you are drawing a tiny detail, your fingers naturally do most of the work.
But if you are drawing a long line across a large sheet of paper, your fingers should not be expected to do everything.
Your wrist, elbow, and shoulder can help.
Think about wiping a large window.
You wouldn’t clean the entire thing by moving only your thumb.
You would move your whole arm.
Drawing works in much the same way.
For broad marks, try keeping your wrist relatively relaxed and letting movement travel through your arm. Artists Network’s beginner drawing guidance specifically emphasizes drawing from the shoulder, while other professional drawing instruction similarly recommends large movements beginning in the shoulder for loose construction work.
The result can feel dramatically different.
Your lines become larger.
Your circles become freer.
Your strokes become more confident.
And instead of your fingers desperately trying to control every millimeter, your whole arm contributes to the movement.
Try the “Windshield Wiper” Exercise
Here’s an easy exercise you can try today.
Grab a large sheet of cheap paper.
Seriously—cheap.
This is not the time to sacrifice your beautiful, expensive sketchbook to experimental nonsense.
Stand up if you can.
Hold your pencil loosely, preferably farther back from the tip.
Now draw huge horizontal lines across the page.
Don’t worry about making them perfectly straight.
Next, make giant circles.
Then enormous ovals.
Then sweeping curves.
Then zigzags.
Imagine your arm is a windshield wiper.
Your goal isn’t to make beautiful artwork.
Your goal is to make movement.
Do this for a few minutes and pay attention to your shoulders, elbows, wrists, and fingers.
Are you squeezing?
Relax.
Are your shoulders climbing toward your ears?
Drop them.
Are you holding your breath?
Please breathe. Your drawing has not become a hostage situation.
This simple exercise helps you experience the difference between drawing with tiny finger movements and drawing with your larger arm movements.
The Paintbrush Trick
Here’s another exercise that sounds ridiculous but works beautifully.
Pretend your pencil is an expensive paintbrush.
Imagine the graphite is covered in wet paint.
Your job is to touch the paper without crushing the imaginary bristles.
Obviously, a pencil does not have bristles.
That’s the point.
Your brain needs a silly story to stop behaving like it is writing an official government document.
Try making the lightest possible lines.
Then gradually increase the pressure.
See how many different values you can create without changing pencils.
You might discover that you were using far more pressure than necessary.
This is particularly helpful for sketching.
Professional Artists often begin with lighter marks and gradually build their drawings rather than immediately carving dark outlines into the page. Brent Eviston’s drawing instruction on Artists Network similarly emphasizes light lines, multiple attempts, and overhand drawing as part of foundational practice.
The Sword-Fighting Exercise
This one is especially fun if you have a large piece of paper.
Hold your pencil loosely like a tiny sword.
Now draw enormous circles in the air.
Then make long diagonal strokes.
Then vertical strokes.
Then horizontal strokes.
Use your shoulder.
Not your fingers.
Not your wrist.
Your shoulder.
You will probably look completely ridiculous.
Excellent.
That means you’re doing it correctly.
The purpose isn’t to create art. It is to teach your body that drawing does not always require a tiny, tense grip.
After a few minutes, sit down and make a normal sketch.
You may notice that your hand feels less cramped and your strokes feel more relaxed.
Why a Bigger Drawing Surface Can Help
There is another sneaky reason you may struggle with pencil grip: your paper is too small.
If you’re drawing in a tiny notebook, you’re naturally encouraged to make tiny movements.
Your fingers take over.
Your wrist becomes the main engine.
Your shoulder basically goes on vacation.
Try working on a larger sheet instead.
A bigger surface encourages bigger movements, which makes it easier to experiment with extended and overhand grips.
You also gain something else: distance.
When your hand isn’t constantly covering the exact area you’re drawing, you can step back and see the entire image.
This is one reason larger or slightly inclined drawing surfaces can work particularly well with overhand techniques.
Don’t Confuse Relaxed With Careless
There is one important distinction here.
A relaxed grip does not mean you should have zero control.
You still need to guide the pencil.
You still need to pay attention.
You still need to practice.
The goal is not to turn your hand into a floppy noodle and hope a masterpiece appears.
The goal is to remove unnecessary tension.
Think about a good dancer.
They are relaxed, but not uncontrolled.
A good tennis player is relaxed, but ready.
A skilled musician doesn’t need to squeeze their instrument as if it owes them money.
Drawing is similar.
You want enough control to guide your pencil, but enough freedom to let the movement flow.
What If Your Wrist Still Hurts?
Changing your grip can reduce unnecessary tension, but persistent or significant pain should not simply be ignored.
Take regular breaks.
Change positions.
Avoid forcing yourself to continue through pain.
Check your posture and drawing setup.
And remember that drawing should not require you to prove your toughness.
If pain keeps returning or becomes severe, consider speaking with a qualified healthcare professional rather than assuming you simply need to “toughen up.”
Your artwork is not worth sacrificing your comfort for.
A Simple 10-Minute Grip Practice
Want to train your hand without turning practice into another homework assignment?
Try this:
Minute 1–2: Hold your pencil normally and make small lines.
Minute 3–4: Move your fingers farther back and make longer lines.
Minute 5–6: Switch to an overhand grip and shade using the side of the graphite.
Minute 7–8: Draw huge circles using your shoulder.
Minute 9: Make loose sketches of random objects around you.
Minute 10: Finish with a few small details using your normal writing grip.
Notice what changed.
Which grip felt easiest?
Which produced the lightest marks?
Which made your wrist feel most relaxed?
That is more useful than memorizing a rigid rule about how an artist “should” hold a pencil.
The Real Secret Professional Artists Know
Here is the secret hiding underneath all these grips:
Professional Artists aren’t necessarily holding their pencils in one magical way.
They understand that the pencil is a tool, not a handcuff.
They know when to move closer for precision.
They know when to move farther away for freedom.
They know when to use the point.
They know when to turn the pencil and use the side.
They know when the fingers should work—and when the wrist, elbow, or shoulder should join the party.
Most importantly, they don’t expect every line to be perfect.
That’s something beginners often miss.
A professional-looking drawing isn’t created because every individual stroke was flawless. It comes from hundreds of decisions, adjustments, observations, and marks working together.
So if your first few overhand sketches look terrible, congratulations.
You’re doing exactly what practice is supposed to do.
Stop Fighting the Pencil
Your pencil does not need to be conquered.
It doesn’t need to be squeezed into submission.
And your wrist definitely doesn’t need to leave the drawing session looking like it just survived a medieval battle.
Experiment.
Hold the pencil closer.
Move it farther back.
Try the overhand grip.
Use the side of the graphite.
Draw from your shoulder.
Work on a larger sheet.
Make ridiculous giant circles.
And most importantly, let yourself make imperfect marks.
Because the goal isn’t simply to learn how Professional Artists hold pencils.
The goal is to discover how you can hold a pencil comfortably enough that your hand stops getting in the way of your creativity.
So loosen your fingers.
Drop those shoulders.
Give your wrist a break.
And let your pencil move.
Your drawing might just breathe a little easier with you.
References
Artists Network — Beginner Drawing Exercises and Pencil Grip
Artists & Illustrators — How to Draw a Portrait with Coloured Pencils